Part Dos - family happenings aka family drama (yep, think I'm late on this one too)
Part Tres - Home Renovations (ok first post on this, not too bad....even though I did plan on it a few weeks ago)
Here we have it, the last of 'Trying Something New' plan. Just remember it's a plan, sometimes plans succeed and sometimes plans fail. I am hoping for the succeeding part.
Last Halloween (October 2015) marked three years for us in our lovely 1908 Folk Victorian Cottage (at least that what the historians tell me it's called). Some good times and some bad, but we are learning what it takes to raise a 100+ year old structure (AKA the money pit).
Recently we considered selling our second love (shock factor due to getting our property tax in the mail - let's just say it is up over 100% since we first purchased the property). That along with escalating utility bills (from heating and cooling over 3500 square feet of leaky, non-insulated walls and windows and doors and floors....the list goes on) and home prices selling for a ton more than when we first moved in. But then we looked at smaller, more efficient homes in the our hood (we do love Grant Park) and realized that if we sold our house and used the profit (a good chunk of change) to put down on another place, we realized that we could get nothing close to what we wanted. So the renovations continue.
When we first moved in there was a small list of 'had to fix right now' items and a lot more 'we will take care of it when we get more money and settled' list of items. Among the most important:
1. Fix half bath in hallway - there was mold halfway up the walls due to a leaky toilet the previous owner did not know how to turn off....
2. Make a nursery out of bonus room by master bedroom - I was 8 months prego when we moved in and didn't have a minute to spare.
3. Fix leaky roof spots (there were several) from years of deferred (NO) maintenance.
4. Find our driveway - back yard was so overgrown, we bought the house before realizing we had a back driveway.
5. Paint - ok, so not exactly a necessity, but it did make the house feel more like home to have non-off white walls everywhere.
As it stands right now, here's our 'To Do' list (here's our original list and photos)
Library
1.
2.
3.
4. refinish gold tufted sofa
5. make window seat bench
Living Room
1.
2.
3.
4.
5. make fireplace functional
 |
| Original Fireplace Brick |
 |
| Thought we might like it in white....uh, NO |
 |
| Ah, just right! |
 |
| Cleared out and ready to be refinished! |
 |
| Sanded down, our floor guy was beyond enamored with our floors, he was a big floor nerd |
 |
| Shiny and new {again} & a tiny silhouette of our dobie in the background |
Hallway
1. create gallery wall (still a work in progress)
2.
3.
4.
 |
| view from hallway to living room & front door |
 |
| View from the living room to the hallway and sunroom/playroom at the end |
1.
2. paint light fixture
3.
1. replace flooring?
2. new cabinets
3. new countertops
4.
5. paint
6. new layout?
 |
| Not bad, I know, but just not enough counter space |
 |
| and that mint/pastel green has got to go |
 |
| Ugh, and the stove vent that looks like it got chopped off |
 |
| Would be so much better if it was open to the dining room |
 |
| Coffee Station aka the place JD and I fight over |
1.
2.
3. refinish floors
4. closet doors
 |
| Mid DIY Paint Job |
 |
| Painting done, time to reasemble |
 |
| Not the neatest, but all painted and DIY old door headboard |
1.
2.
3.
4.
5. replace lights
Jack & Jill Bath
1. paint
2. mirror for vintage sink
3.
4. refinish floors
5.
6. replace vanity lights
Back bedroom
1. paint
2. refinish floors
3. closet door
4. new light fixture
 |
| love the interrogation style single light hanging from the ceiling.... |
1.
2.
3.
4.
5.
6. replace windows
 |
| Trim Painting time |
 |
| Oops - wrong touch up color - time to repaint....the whole room |
 |
| Another paint job done! |
 |
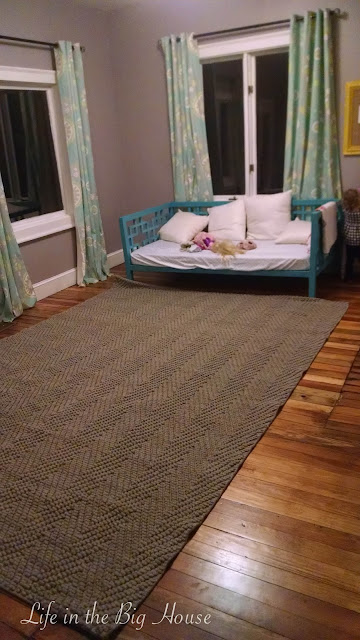
| New rug {LOVE} |
 |
| Yep, that's a playroom for sure |
 |
| See that white door? That goes to the 'Midget Bath' |
1. replace floors
2. replace window(s)
3.
4. new door
5. paint
Midget Bathroom (lovingly referred this way due to the my height door and smaller than normal tub size)
1. Remake into a butler's pantry (see below)
 |
| The green plastic tile, the palm tree wall paper, the nailed shut window, all so perfect...NOT |
 |
| Yep, that's a capped off toilet hole. We get fancy around here. |
 |
| See that tub? That's your average short tub. Even for me, I have to bend my knees |
 |
| I tried a pano shot with my iPhone so you could take it all in at once |
 |
| another tub shot - aka the dog bathtub |
 |
| Even though I don't want this sink for this space, I'm hoping someone else can use it |
Laundry Closet
1. add shelving
2. tile flooring
3. paint
Sophie's Room
1.
2.
Master Bedroom
1.
2.
3. refinish floors
 |
| Added a new light fixture |
CJ's Room
1.
2.
3.
1. replace pedestal sinks with vanity
2. replace tub in surround with free standing tub
3. new shower
4.
5.
6. replace chandelier
7.
~whew, that is a list.
Our newest project is a biggie. The KITCHEN. If you remember the above list of 'To Do's', just go ahead and squash the kitchen list, because there is soooooo much more to do than those few things. This list is much more realistic (and expensive):
1. Open wall between dining room and kitchen
2. Take down all upper cabinets
3. Replace single window above sink with 3 windows
4. Move current door to where larger window is
5. Open up wall between kitchen and midget bath (aka butlers pantry)
6. replace all cabinets
7. replace all counter tops
8. replace slate tile with wood flooring to match the rest of the house
9. install subway tile to the ceiling on stove side
10. new farmhouse sink
11. remove existing pantry and replace with furniture like hutch
12. Barn door for butler's pantry entrance
13. Butler's pantry
a. remove tub and sink
b. replace window
c. install lower cabinets on each side
d. install beverage cooler
e. install butcher block counter tops on each side
f. new sink and faucet
g. add open shelving with reclaimed wood
h. new light fixtures
Now that ladies and gentlemen is a LIST.
Throughout our renovation, I'll keep you updated on what our budget is and what we have actually spent on things. We have hired a contractor so we will not be doing the labor ourselves (who has the time for that??). Our total budget is $40,000, but, I'll detail that for you more next week along with our design.
Will this be my dream kitchen??? Or biggest nightmare??? So exciting!!!
If anyone has any kitchen renovations suggestions, please, send them my way!


My parents recently redid their kitchen. They kept the existing layout, but refinished the existing cabinets (so I can't give a recommendation on cabinets). They did put in new counter tops and used Inman Park Marble and Granite. They were recommended to us and they did a great job, including recommending a less expensive quartz over the more expensive options. Everyone we dealt with there was quite good.
ReplyDeleteThanks Becky! We are keeping the same layout as well, that deff seems to make $$ sense! I'll check out Inman Park Marble, thanks for the reference! It's always nice to have the salesperson try to actually work with you rather than just sell you the most expensive thing. Thanks again!
ReplyDelete